Friday, June 5, 2015

All About Lemon Cucumbers

Growing Lemon Cucumbers

In seed catalogs as early as 1894.  In a paper for the Horticulture Department at Cornell University, R.W. Robinson opines that that the lemon cucumber may be the oldest cucumber cultivar in existence today.

A Young Lemon Cucumber
A lovely bright yellow round cucumber with notes of lemon, this cucumber cultivar stands out from the crowd.  It is wart-free, and small enough to eat in a single sitting .  No need to peel this beauty, the skin is very thin, without that bitter taste.  A great slicing cuke for salads, crispy and potato chip sized.   You can cook and pickle the 'lemon' cucumber too.  Rarely seen in conventional grocery stores, you'll have to poke around your local farmers market to get a taste.

The best way to enjoy this fruit is make it a part of your homegrown garden.  But be forewarned, this plant can be delicate.  It is prone to disease and often has a low yield.  I've had troubles in the past.  Because it is late blooming, I've lost plants to powdery mildew before picking fruit.  Insects can wreck havoc on this plant too.  You'll need a keen eye to catch problems before they become a death knell.

Train your plants up netting, or a trellis to save room in the garden as long as you have plenty of pollinating insects visiting your plants.  I always trellis my cukes, I feel like I have a better eye on the pest and disease situation.  Since I live in San Diego, where we rarely get rain in the summer, I planted my cucumbers right next to an olla watering vessel (A terracotta vessel under mostly underground that I fill with water to keep surrounding soil moist- more info in a later post).

Pick your lemon cucumbers as soon as they are a couple inches in diameter but no more than a 4" diameter.  Not only will you run the risk of getting hard to eat seeds, but you'll be telling the plant to slow down fruit production-- So pick early and often.

Can you save the seeds from your lemon cucumbers? Short answer is, 'yes', with reservations.  The Lemon Cucumber is an open pollinated seed.  That means that it will cross with other cukes in the neighborhood.  If you want a pure lemon cuke seed, be sure that you don't grow any other kinds of cukes, or if you have a big garden, be sure that your cucumber varieties are at least 1/2 mile apart.  Or, if you are a seasoned savvy gardener, you can hand pollinate your plants (please do further research if you want to try).  That being said, crossing with other cukes may not be so bad after all.  It would be a gamble to cross pollinated seeds, but if you have the time, space, and desire- go for it.  Leave the lemon cukes on the vine until over ripe.  Then scoop out the seeds and slime, let the goo sit on the counter for a few days (think tomato seed saving process) to ferment.  Mold and other icky green stuff may start growing.  Stir the mixture frequently.  Once the seeds settle on the bottom, and the slime is broken up, rinse off your seeds, let them fully dry on a plate, label and store for next year.

The Stats
Sowing: Directly in the Ground, 1" deep
Days to Maturity: 65-68
Water: Moist
Dirt: Normal, Well Drained, Loamy
Sun: Full
Genus: Curcumis
Species: Sativus


My Sources
Origin and Characterization of the 'Lemon' Cucumber by R.W. Robinson
Heirloom Cucumber Varieties by  William Woys Weaver August 2013 for Mother Earth News

Buy the Seeds Here:
High Mowing- Organic and Non-GMO
Park Seed- Disease Resistant
Sustainable Seed Company- Certified Organic
Baker Creek Heirloom Seeds

Saturday, May 30, 2015

Our DIY A-frame Chicken Coop

I have six girls: Claudia, Heidi, Tyra, Marissa, Giselle, and Cindy.  They are teenagers at 14 weeks now, getting their big-girl voices and clucking and bocking here and there.  Sometimes they look skinny and scrawny and then next minute they seem big huge and giant breasted.  Yes, yes, I am talking about chickens-- not people.

My fiance and I have spent way too many hours building the girls a coop, and digging and driving around town looking for the best prices for organic chicken feed.  We bought both our chicks and feed from City Farmers Nursery in San Diego.  The feed is about 40 bucks for 50lbs.  For the cost of building the coop, and food so far, the first eggs are going to be like golden eggs.


The Coop before moving it down the hill and adding the "run" area.
The coop is constructed from fencing planks, 2 by 4s and plywood.  Hardware cloth is everywhere is is not cheap! The A-frame is about 30 square feet, and the total outside area is about 100 square feet.  The outdoor area has a bamboo roof (with a tarp for when it rains).  The whole coop is seated on a steepish hill, and is about 8 feet tall.  The floor of the hen house is covered in left over laminate flooring stickers (left over from our bathroom project but less than 5 bucks to buy) to better clean up in there.  The side of the A-frame is shingled with left over roofing shingles from our roofing projects (no good pictures of it shingled).  
Inside view with heater.

It probably cost around 250 dollars at the end of the day.  But the total hours of building and getting it situated on a hill was huge.  Easily 40 hours each.  Not to mention my mom and dad helped a lot too. Had we had level ground, and no predators about, it would have been a much faster and cheaper build.

The coop is not only on a hill, but right next to open spaces land in San Diego.  So there is no doubt, coyotes, raccoons, opposums, snakes, and most definately ferral cats (lots of pet cats too).  So, we had to build a sturdy coop and bury in the hardware cloth for any burrowing creatures.  The land is mostly clay, and full of giant stones too.  I burned some calories working on the girls house!


Almost a "tiny house." Mom helping out.
Notice the vinyl tile flooring.


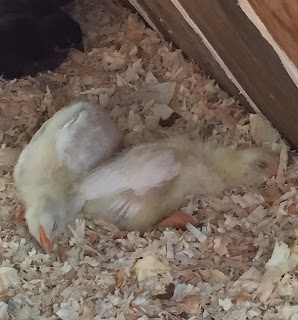
We took the girls home when they were 3 weeks old.  Little cuties. Peeping and scurrying about. I didn't use a brooder, rather the A-frame coop house worked great for the little ones.  We just didn't lower the ramp, they were forced to stay in the house for the first four weeks.  A heat lamp kept them warm.  The fiance and I set up chairs next to the coop to sit and watch "chick TV."  We were instantly smitten and demanded that all of our friends come by and see our little bundles of joy.


Officially cat-proofed.

The Leghorns sleeping.
Did you figure out that they are named after supermodels?  It was only natural, seeing as they strut around all the time!

Wednesday, May 27, 2015

Growing Pink Banana Squash

Pink Banana Squash- 9 weeks old
Nothing cheers me up more than a garden nursery.  What cheers me up even more is when said nursery has a basket of Botanical Interests seeds on sale because they expired two weeks earlier. Well, I'm one for a deal! True true that they say old seeds don't germinate at a great rate... I say so what.  I only grow one or two plants, and the seed packets have so many more than two plants. So doing the math, I'd say I'm likely to succeed!
Enter the Pink Banana Squash. If you are reading this page, you have probably done an internet search already.  That means that you have seen the many pictures of people struggling to hold up a giant pink oblong blimps.  I hope the 14-year old inside you giggled as much as I did.  Let's just say the squash looks like something out of a tacky romance novel.

Naturally, I cannot wait for this plant to grow.  It is tucked in the corner of a raised bed on a south on an east facing hill.  It took about a week to sprout.  March 16, 2015 was the day it peeped up from the ground.  Every year I struggle with squash because of the ubiquitous powdery mildew.  This year I am trying something new.  Equipped with a three dollar spray bottle from Home Depot, and a solution of 25% milk to 75% water I am planning on spraying the plant every two weeks (more likely once a month).

UPDATE June 3, 2015:
I picked this first squash on June 3, about 12 weeks after it sprouted.  I was really worried that the plant was not setting additional fruit, so I picked this massive squash early.
UPDATE June 5, 2015:
The first signs of powdery mildew are showing.  I'm going to spray the leaves with the mild milk solution this evening.  Cross your fingers it does the job.  Though there are clearly signs of some leaf burrowing bugs too.  I'm going to focus on the mildew first, then attack the bugs.


Wednesday, May 20, 2015

Crimson Sweets, Sugar Baby Watermelons & Ollas- Southern California


Its that time of year again! Whoo-hoo! Watermelon season.  Last year I grew Crimson Sweet melons in my back yard--er-- I mean, canyon/very steep hilly area with a few mostly flatish areas.   It was an insane spreader and covered a serious amount of area.  I grew it in a raised bed, and let the vines fall over the corner so as not to take of the entire box.  Read about it here.  At the end of the season I ended up with four 25-30 lb melons, so about 100 pounds of watermelon.  Oh yea!  Being a watermelon freak, I want more.  

Saving watermelon seeds is a breeze.  Eat the watermelon, spit out the seed, rinse and let air dry.  Wrap up the dried seeds and keep in a dry place with moderate temperature.  Plant again next spring.  And that is just what I did.  Let me tell you, you can plant a watermelon farm with all the seeds you could save.  BUT, make sure your variety is open pollinated and that you only grew one variety of watermelon that year.  Otherwise you may get a watermelon vine with no fruit, or a wacko watermelon that may or may not taste any good.  Seems like a fun experiment to grow a mystery fruit, but if you don't have the space to waste, then you may want to just compost those mystery seeds.
Crimson Sweet Seedling & Terracotta Olla Waterer

Did anyone tell you there is a drought in California? No?  Well there is.  In San Diego, we are only allowed to water on certain days of the week and for limited time.  Buzz kill if you are a really into your home garden; needless to say I've had to get creative this year.  I'm doing the olla-thing.  The Olla thing involves burying a water permeable vessel next to your crops and watering your plants by filling the vessel up with water.  The vessel will leach water into the soil  thus ensuring the roots to your plants are nice and well watered.  You don't add water to the surface where it can run off and evaporate.  Ollas are made of earthen clay that hasn't been glazed.  BUT ollas are like 30 bucks a pop!  By the way 'Olla' just means pot in Spanish, so peeps might be really confused if you just start taking about ollas in garden!  
Sugar Baby Watermelon & Strawbs

I went cheapo and bought terracotta pots, glued them together until totally sealed, but for a hole in the top for filling with water.  I "planted" the terracotta olla next to my crimson sweet seeds with the top above ground and filled the vessel with water regularly.  Since I am mostly filling it with water I collect inside the house while waiting for faucets to spit out hot water, I am thinking it doesn't count as "watering."  Low and behold, my seeds sprouted and I've got a baby crimson sweet starting to grow.  I am worried that I didn't amend my soil enough to take into account the extreme clay content in the ground.  But I've mulched it already and am gearing up to add more mulch in hopes of combating this nasty water  deficit.  

Sugar Baby Melons- I picked up some Sugar Baby Melon seedlings at Walter Anderson's Nursery (my favorite SD nursery).  I tucked a plant into a raised bed and am still trying to figure out where I can put another plant or two.  I hope to be knee deep in melons this summer.  Smitty, my 8 year old corgi, loves chomping on watermelon and watermelon rind and I anticipate my chickens be all over watermelon too.  I just can't get enough.  


Header Image Courtesy of irum of freeimages.com

Tuesday, April 14, 2015

Padron Peppers - A Year Later & Padron Chicken Slow Cooker Recipe

Padron Peppers, Fresno Chiles, and Cubanelle Peppers from Year Old Plants
I wrote about my foray into growing Padron peppers last year (read about it here).  It was all so trendy.  Shisito peppers are at Trader Joe's now, and for some reason, restaurants charge a pretty penny to get these peppers as an appetizer.  Just grow them yourself.

I'd read about people overwintering pepper plants to get several years harvest out of one plant by digging them up and bringing them inside for the cold winter months.  I guess I did that.  I didn't have the intention of overwintering my plants, but, well--- don't get mad at me-- but..er... San Diego just didn't have a winter this past year.  So, thus, I overwintered my plants by doing nothing more than not digging them up at the end of the season.

The plants just didn't do much growing between November and February, but they are back, leggy, but back.  Around November 2014, I pruned the heck out of the plants, but that was it.  So, I am here to say that if you happen to live in a San Diego-type climate and want to keep your pepper plants, just prune them and let them be.

That being said, I've cooked up a couple batches of padrons so far this year.  I did the basic cast iron pan saute with olive oil and salt.  But, Oh Lordy, I couldn't eat them.  Way too spicy for me.  Last year, you'd get a spicy one every 6 or so peppers.  This time it was two spicys to one mild.  Being a sissy la-la when it comes to heat, I'm not amused.   Time for creativity to use up all the spicy peppers.

Spicy Padron Slow Cooker Chicken:
 Now, I don't eat chicken, so don't ask me what it tasted like, but I have on good measure that the recipe was a hit.   Basically, chop up (food processor, knife, or mortar and pestle) an onion, a bunch (15ish) of padrons, and a few garlic cloves. Saute with olive oil, add cumin, salt, pepper, oregano for 10 mins or so.  I wanted to thicken it up so I mashed up some pinto beans and added to the pan.  Dump in crock pot.  Add a few cups of broth.  Add chicken (I used parts of a whole chicken I cut up).  Cook on low until chicken is falling off the bone.  Take chicken out of the crock.  Discard bones, and cartilage.  Shred.  Put back into crock pot with all the juices.  Add more or less stock to taste.  Add whole beans if you want to.  Add cilantro, green onions, avocado, chopped up fresh padrons, squeeze of fresh lime juice, cheese--- you get it to make a chili.  Or just pull out the shredded chicken for tacos.
If your Padrons are not so spicy, consider adding some jalapeno, fresno chili, or other medium heat peppers to liven it up.

Saturday, August 23, 2014

Watermelons Growing in San Diego- Crimson Sweet Variety

Crimson Sweet just  3 days apart!
 I love watermelon.  LOVE.  So this year, now that I started garden boxes in a central neighborhood of San Diego, on a canyon with a whole lot of sun, I thought I'd try my hand at growing some.  I forget where I bought the seedling, but it was only 2 bucks.  I tucked it into the corner of one of my raised beds and thought it could grow over the side on onto the grown surrounding the box.  I figured it would be a sprawling plant, but didn't think it would take over the yard... which it did.  I took a few pictures below of the evolution of the watermelon vines.  I didn't take any snaps of them fully growing, but imagine double the size of the larger picture.
Crimson Sweet is the type of watermelon.  20-30 lbs when ripe.  So far, I've picked 4 big watermelons.  Two of them have been super sweet and amazing, the other two were amazing but not as sweet.  All good.  It is a trip having a watermelon with seeds.  Its like I had forgotten that they existed.  I can't remember a supermarket in recent history selling watermelons with seeds. Nutty.  You bet I am saving these seeds for next year.  It is late in August now and I still have several small watermelons growing on the vines, though I don't have high hopes that these will be as good as the first 4.  All in all, I've got about 100lbs of fruit off the one plant. Crazy.  It is possible, by the end of the season, I'll have harvested 200lbs from the one plant.
Crimson Sweet about a month old
Crimson Sweet 2.5 months old
 I'm pretty sure I'll grow these again, but they do go crazy with the vines. Any tips on pruning back watermelon vines?

First melon of the harvest.  (Please ignore the fanny pack and weird hat hair do)

Friday, August 1, 2014

Growing and Eating Padron Peppers in San Diego

Padron Close Up. 
Oh Padrons... it is as if you didn't exist until four years ago. Certainly, I'd never heard of the pepper and that no one else that I knew had a clue these babies existed until this decade.  Maybe I'm wrong.
It wasn't until Suzies Farm, here in SD started putting these guys in their CSA box that I got a first taste.  Admittedly, I wasn't sure what to make of these.  Then all the rage broke loose.  Even my bougiest hippster-esq San Francisco couple featured these guys at their wedding meal.  (Which is also funny when a guest would get one of the hot ones and start squirming and making silly faces.)  So basically this is the pepper to have if you were a foodie in California just three years ago! It is true.
Fast forward to now, and I think the peppers have lost their hip edge and have made it to the masses.  Let's just say that in Santa Rosa, I purchased a big bag of them at the 99 Cents Only store (yes, I'll get a CSA and buy produce at the dollar store).  These peppers made it to the dollar store.  Sure the dollar store was located in the famed Sonoma Valley, but nonetheless it was there.

How To Eat Them:
Best eaten young and under ripe, you can eat them raw for a crunch, or, the best way-- saute them in olive oil until just before blistery but taking on color, and then serve with a generous sprinkle of sea salt.  To eat them, grasp them by the stem and pop it in your mouth whole.  Most are totally mild.  But... beware, you will find a hot one.  Have a cold beer close at hand-- for real.  The hot ones are hot.  As the season gets later, the hot ones will be much more prevalent.

Growing Padrons:
Cruising Walter Anderson's Nursery here in San Diego (everyone cruises garden centers, right?) I couldn't resist the siren call of the Spanish Padron peppers.  Buying two 6-packs was a bit much, but turns out it was just fine.  I put the starts in the garden in April and was getting handfuls of peppers by June.  In fact, they are still giving peppers now, the production has slowed down a bit and the peppers are nearly hot peppers rather than the mild early season fruits.  They really impress guests when sauteed as talked about earlier and they are so stupidly easy to do AND you only need salt and olive oil.  Awesome for a last minute soiree.

By the way, the plant gets fairly tall, about 2-3 three feet tall. All the more pepper to love.  I've had zero bug issues and am so satisfied with these plants I'm going to do some seed saving to enjoy them again next year without spending the cash on starts.  Yippee.