Friday, August 10, 2012

I Didn't Mean To Grown Onions!

Red Onions Curing


 Growing Red Scallions

I didn't intend to grow red scallions, but there was a package of three dozen bulbs on sale at Walmart for something around $1.50.  I figured it was winter here in San Diego and I had enough room for them in my Earth Box, so what did I have to lose?  I plopped the bulbs in lines in the back of my Earth box with very little fanfare.  I was pretty lazy about the whole thing.  I didn't want to invest a whole lot of time on bulbs from a giant box store-- I wasn't convinced that many of them would sprout up.

I was wrong, all the bulbs became scallions.  I snipped them and ate them regularly all spring.  When they started looking a bit old, I pulled up all but a dozen and chopped them up and froze them for use in soups and other fun dishes.  They are just fine when heated in a soup, but a bit wilty if used in a salad or other raw unheated dish.  It was way worth the $1.50 and the very little effort on my part.

 I left about a dozen scallions in the pot.  They have developed big poofy white flowers that are now developing seeds. I pulled up half of them when the leaves turned brown to find that several had become largeish red onions.  I've had them hanging to dry and cure out for a couple of weeks.  It is the plant that just keeps on giving.  Green onions first, red onions later!

Drying and Curing:
First, I left the onions on my counter to dry out the roots for a few days (it has been very warm here).  After, I twirled up the greenish/dying tops and secured them with a rubber band.  I placed them on a nail in my hall closet to keep them in a dark dry spot.  But I promptly relocated them when my hall closed began smelling like onions! They are pretty dry now and since I intend on eating them relatively soon, I didn't bother with a long drying/curing stage.  If I had a huge crop and intended them to last well into the winter, I'd have been more particular about this stage.

Eating:
Chopped up one of these guys yesterday with a few homegrown tomatoes, avocado wedges, salt, and olive oil.  Perfect onion flavor without a huge oniony bite. 

Infused Onion Blossom Vinegar:
I lopped off one of the blossoms and covered it in vinegar, to make an infused vinegar.  It has been steeping for a few weeks now.  The other four blossoms are still on the plants.  I am going to harvest the seeds once they fully develop and hope to see more bulbs next spring.  Why not? 

Monday, August 6, 2012

Homemade Cranberry Juice & Pops

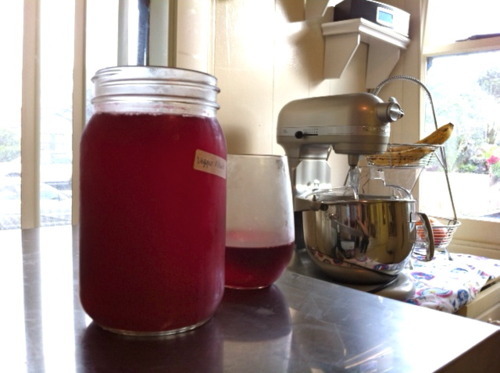
Finished Juice
I stocked up on cranberries last fall when they were on sale for a dollar a bag.  I love them, can eat them raw without sugar.  Love Sparkling Cranberries. Love cranberry smoothies, cranberry sauce, cranberry relish, cranberry whatever.  So, why not cranberry juice?  Here is what I did:
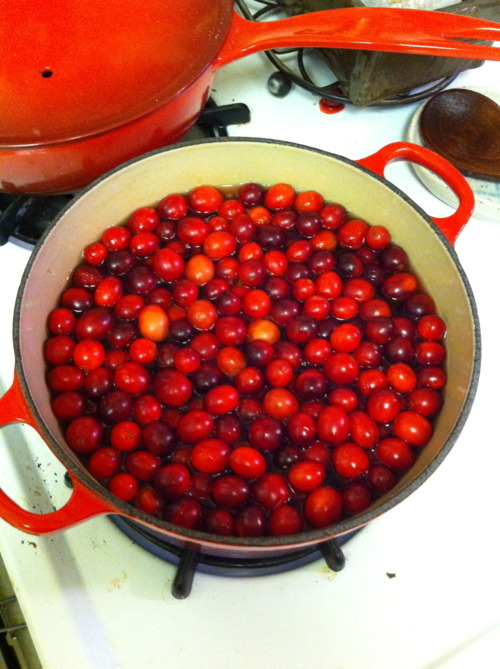
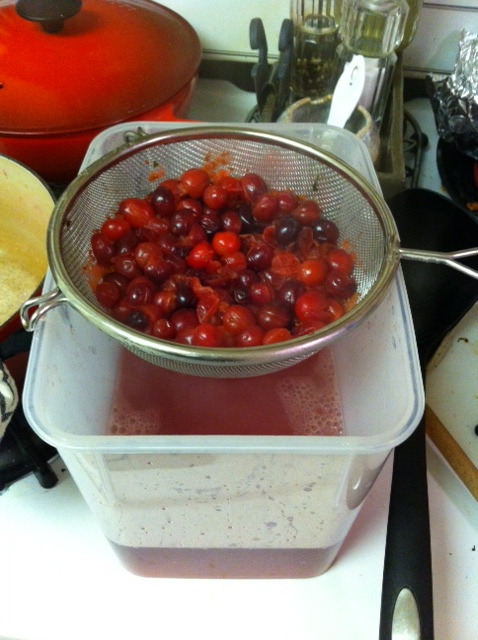
Put cranberries in water in a sauce pan.  Bring to a boil.  Simmer for a few minutes but do not crush the berries.  Make sure all the berries are popped (you'll know it when you see it kind of thing).  Then gently, so you don't crush the berries.  Strain the cranberries (I used a sieve, but a colander would work just fine).  All the water is now cranberry juice.  So you see, if you want stronger flavored juice, use less water.  I generally just poured water in and went from there.  You can always add more water afterward.  Now, taste the juice and add sweetener, if you want.  I added regular sugar though I would certainly try honey, agave, or stevia in the future.  Chill it, and you have your own juice.  And yes, it is way better than the stuff you get in the store.
Cooking CransStraining Crans
Now for the bonus.  Cranberry Popsicles.

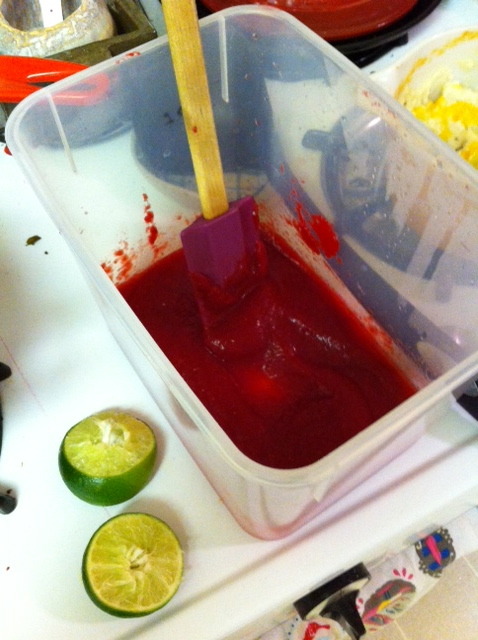
You have all those uncrushed cranberries sitting in the sieve.  Start pushing them through the sieve into a second container.  You want to push all the good pulp out of the berries while leaving the skin behind.  This is the same process for making cranberry sauce. Discard the skins.  Add sweetener of your choice (or maybe even apple juice or some other kind of naturally sweet liquid) and a liquid (I added some water and lime juice).  Add just enough liquid to get a runny consistency.  Taste it.  If you skimp on the sweetener, your pops won't be sweet (which is just fine, but I wanted a dessert).  Here I added a bit of stevia because of how tart the cranberries and lime tasted and I added sugar too-- because I think sugar tastes better than stevia.  Now pour into you popsicle molds, put in the freezer, add the sticks after about 45 minutes.  Done!

Thursday, August 2, 2012

Self Watering Planter from a Brita Pitcher


I love self watering planters; they are both brilliant and forgiving.  There are so many tutorials out there about constructing your own self watering planter.  In the most basic form, there is a water basin, a contained small area of soil touching down into the water basin, and an upper basin holding all the soil and plants.  A Brita, or any water filter type pitcher, has a lower basin (where all the filtered water goes), an upper basin where the faucet water goes, and a cylinder to hold the filter that reaches from the upper chamber to the lower.  Exact same idea as a self watering planter.

I thought I'd give it a try as a mini kitchen garden.  I put some decorative rocks in the lower chamber so my planter would have a lower center of gravity and be less likely to tip over.  Then I placed a square of old t-shirt (anything that allows water through but stops all the dirt from coming out the bottom will work) over the grate at the bottom of the cylinder.  Filled the top chamber with soil and potted a few lettuce seedlings.  Then a watered a bit on the top of the soil to get it going and filled the bottom chamber with water.  The water level has to be fairly high because it must be filled a few inches above the cylinder. 

That was it.  All I had to do was maintain the water level above the cylinder.  Full Disclosure: The water did get murky.  I suppose one could lift of the plant part and fill the bottom with fresh water from time to time to have a more pleasant looking plant.  But the main point is that the pitcher totally worked!  Perfectly watered lettuce up until the time I ate it for dinner.

Currently, I have it next to a strawberry plant outside that is sending out runners.  The runner roots are already coming out the bottom.  So very easy, and a great way to up-cycle those old filter pitchers!

Monday, July 30, 2012

It Finally Happened: My Orchid Re-Bloomed

It has been about 10 years since I have been buying orchids at Trader Joe's and other such places.  I convinced myself that buying them over and over again is like saving money because the flowers last at least a month and would be cheaper than buying cut flowers every week.  (Not that I have ever actually bought cut flowers once a week, but IF I did....).  I have never once succeeded in a re-bloom.  They were basically long lasting cut flowers.  Yes, I poured over my books and other peoples blogs about making it happen.  I watered frequently, I watered infrequently, I trimmed the stem, etc.  None of these things ever actually worked.  Eventually the leaves turned yellow and the plant was tossed.

BUT, now everything has changed!  My mother bought me a lovely yellow orchid for my birthday last November.  It kept flowers on it until mid-December.  A few months later I was visiting a friend and noticed that he had an orchid on the verge of re-bloom.  His answer was simple, keep the orchid in a window and every time you water it (like once a week), give it a quarter turn.  Could it be that easy?  Window, water and quarter turn?

So, I did that very thing.  I set a calendar reminder to water the plant every Thursday.  The way I water is pretty straight forward.  My pot has holes, so I stick the plant under the kitchen sink and soak through with water.  Then I make sure all the water is drained out.  Yes, of course, I did still forget to water it some Thursdays and it still re-bloomed.  As I said, my plant is in a pot with plenty of holes so it gets plenty of air (the perk of taking ceramics classes is being able to make holey pots in just the right size!).  I cut off the flowerless stem about mid way down and just above one of the nodes (or what I think was a node).  I placed it in a west facing window because that was the only practical window in my apartment. I watered and turned for a couple months.  Sometimes, I'd put a few drops of African Violet fertilizer in the water, because that is the fertilizer I already owned.
Then, out of now where it started growing a new stem.  A month and a half later, it started blooming.  There have been blooms on it now for at least two months and it seems to be going strong.

Yellow and pink orchid re-blooming- July 2012
My Four Easy Steps to Re-Blooming An Orchid:
1. Put the orchid in a window.
2. Make sure the plant has plenty of air circulation around root system.
3. Water once a week by soaking the roots and letting excess water drain out (i.e. no standing water in the roots).
4. Turn the plant a quarter turn with every water. 

I hope these steps work for you too.

Wednesday, July 25, 2012

Chive Blossom Infused Vinegar


It has been ages since I blogged.  Still gardening, just not blogging.  You know the story.  But I had to break my silence for this discover.  I saw somewhere (and I am sure I pinned it on pinterest) chive blossom vinegar.  Yes, yes, yes.
I have two chive clusters growing this year.  What happens is that my chives all start flowering, I dead head the flowers when they are dry and just bury them back in the soil.  So, as you can imagine, my chive clusters keep getting bigger.  Sometimes I remember to eat the flowers on salads and once I sprinkled the petals on some risotto (highly recommended and really impresses the guests). I really like eating the flowers, but I just forget about them.  It feels like this season the little purple flowers have been prolific.  Constant flowers.  I was thrilled to find this recipe for infused vinegar.

Vinegar recipe:
Snip Chive Flowers (just the good ones) and cover them with white distilled vinegar.  Let sit for 2-3 weeks.  Strain and filter.  Filtering is just super straining to get a clear vinegar.  Basically use a coffee filter.  Also, you can shake the jars from time to time if you feel the urge.

What I did:
This morning I snipped off approximately 6 chive blossoms.  I rinsed them to get rid of any inhabitants and set them on a towel to dry a bit.  Then I washed a canning jar and the lid.  Ready to go.

Because I was feeling particularly excited, I snipped of a largish onion blossom as well.  I had bought some purple bulbed green onions last spring from none other than Walmart.  They grew very nicely and I enjoyed the constant availability of fresh green onion.  I didn't eat them all and I now find myself with a dozen or so way too overgrown/massive green onion stalks.  Several stalks formed large white flowers.  I'm nothing but curious, so I have just been watching them grow.  I am hoping that they will go to seed and give me some volunteer onions for the fall season.   (I love volunteer plants.  I've got a volunteer lettuce and parsley plant growing right now from former plants that have since gone to seed and been removed).  But in my excitement for chive blossom vinegar, I thought why not have purple green onion blossom vinegar as well.  So I plucked off one of the large cream colored flower heads and dumped it in a second jam jar.

I filled both jars with vinegar.  After only a few hours the chive vinegar is turning pink and smells like onion.  Now to wait.

My plan is to continue to add chive flowers to the vinegar they become ripe, or perhaps start a second jar.  It isn't too early to start infusing stuff for the holidays.  I may try the next batch using white wine vinegar instead of distilled vinegar.  And who knows, I am feeling inspired to toss a few blossoms into my jug of refrigerator pickles.  YUM!

Tuesday, August 16, 2011

Ultra Dwarf Nectarine Harvest

I promised that I would tell you whatever happened with my nectarine.  Well, here it is. I got about 10 mini nectarines. They were DELICIOUS.  They were ready and falling off the dwarf tree about two weeks ago.  It was such a surprise how tasty the were.  I am so very pleased with this little guy.  I cannot wait to see what he will do after I prune him back in the fall.  I can already see little nodes developing on all the branches (actually, I am not sure at all what that means-- maybe I should do some research soon on when exactly and how I am supposed to prune this guy).  I wish this photo could really show off how small the nectarines really are.  The dimensions look funny. But that glass bowl they are sitting in is pretty tiny.  Not even really the size of a regular cereal bowl.  I'd estimate that the fruits were a bit larger than a golf ball.


Thursday, March 10, 2011

Ultra Dwarf Nectarine

About a year ago Sandra and I went to Lowes browsing the veggie seedlings.  There was a sale on dwarf and full size trees.  I snagged this ultra dwarf nectarine for 5 dollars.  Seriously, 5 dollars.  I have no clue whether a nectarine will thrive in a pot in San Diego, but I guess we will all find out.  I potted it in a lightweight pot from Walmart (cost 20 bucks) and it did nothing.  It just chilled with its leaves until the fall when it dropped all its leaves and just looked like a few sticks-- a few sad sticks.  Then about a month ago I noticed it was growing some nubby things.  Well, those nubby things, it turns out are flower buds.  I snapped a picture this morning of the first flowers and you can even see the little leaves that are about to explode.
I cannot wait to see the whole tree full of these delicate pink flowers. I will just die if I open my curtains in the morning and see hummingbirds poking around the flowers.  Then I would just die again if it actually gives me some nectarines! I have pretty low expectations since I haven't ever seen a stone fruit tree anywhere in my neighborhood.  Time will tell.
Oh, and just to be extra adorable, I planted four June-bearing strawberries at the base of the tree.  It would be ridiculous to see big red strawberries living next to ripening nectarines.  Don't worry, if that happens I will definitely post some pictures.